Разработка
8 секретов SwiftUI, которые делают сложные интерфейсы простыми
Вот 8 возможностей SwiftUI, которые помогают сделать сложные интерфейсы значительно проще.


1. OutlineGroup
Представьте приложение «Файлы». В папке могут находиться файлы, а также другие папки, внутри которых есть ещё файлы и папки, и так далее. Такая структура называется деревом.
OutlineGroup отображает такое дерево за вас. Каждая папка получает небольшую стрелку, на которую можно нажать, чтобы раскрыть или свернуть её.
Код:
private struct FileNode: Identifiable {
    let name: String
    let icon: String
    var children: [FileNode]? = nil

    var id: String { name }
}

struct OutlineGroupDemo: View {
    private let project = [
        FileNode(name: "Sources", icon: "folder.fill", children: [
            FileNode(name: "App.swift", icon: "swift"),
            FileNode(name: "Views", icon: "folder.fill", children: [
                FileNode(name: "HomeView.swift", icon: "swift"),
                FileNode(name: "SettingsView.swift", icon: "swift"),
            ]),
            FileNode(name: "Models", icon: "folder.fill", children: [
                FileNode(name: "User.swift", icon: "swift"),
            ]),
        ]),
        FileNode(name: "Resources", icon: "folder.fill", children: [
            FileNode(name: "Assets.xcassets", icon: "photo.on.rectangle"),
            FileNode(name: "Localizable.xcstrings", icon: "globe"),
        ]),
        FileNode(name: "README.md", icon: "doc.text"),
    ]

    var body: some View {
        List {
            Section {
                Label("Package.swift", systemImage: "shippingbox.fill")
                Label("Tests", systemImage: "checkmark.diamond.fill")
            } header: {
                Text("Pinned — plain rows")
            }

            Section {
                // Folders become disclosure rows; nodes with children == nil are leaves.
                OutlineGroup(project, children: \.children) { node in
                    Label(node.name, systemImage: node.icon)
                        .foregroundStyle(node.children == nil ? .primary : Color.accentColor)
                }
            } header: {
                Text("Project — OutlineGroup")
            } footer: {
                Text("List(data, children:) turns the whole list into one tree. OutlineGroup is the same tree as a piece you can drop anywhere: here it shares the List with a normal section and only owns the rows it builds. It walks the children key path for you, at any depth.")
            }
        }
    }
}
2. OffsetShape
Скорее всего, вам знаком .offset у представления: он немного сдвигает представление в сторону. Но у фигур есть собственный .offset, и работает он иначе. Он возвращает OffsetShape, который по-прежнему остаётся фигурой. Перемещается только её контур.
В демонстрации ползунок изменяет расстояние, на которое сдвигается второй круг. При значении 0 ничего не остаётся. Если увеличивать значение, сначала появляется тонкий полумесяц, затем более широкий, а затем полная луна. Пунктирный контур показывает положение сдвинутого круга, чтобы было видно, какая часть вырезается.
Код:
struct OffsetShapeDemo: View {
    @State private var shift: CGFloat = 60
    @State private var showsCutter = true

    var body: some View {
        VStack(spacing: 24) {
            ZStack {
                // The cutter is the same Circle, only its path is shifted.
                Circle()
                    .subtracting(OffsetShape(shape: Circle(), offset: CGSize(width: shift, height: -shift * 0.4)))
                    .fill(.yellow.gradient)
                    .shadow(color: .yellow.opacity(0.6), radius: 20)

                if showsCutter {
                    OffsetShape(shape: Circle(), offset: CGSize(width: shift, height: -shift * 0.4))
                        .stroke(.white.opacity(0.6), style: StrokeStyle(lineWidth: 2, dash: [6, 6]))
                }
            }
            .frame(width: 200, height: 200)
            .frame(maxWidth: .infinity)
            .padding(.vertical, 40)
            .background(.indigo.gradient, in: .rect(cornerRadius: 28))
            .clipShape(.rect(cornerRadius: 28))

            VStack(alignment: .leading) {
                Text("offset: \(Int(shift)) pt")
                    .font(.callout.monospaced())
                Slider(value: $shift, in: 0...200)
                Toggle("Show the offset circle", isOn: $showsCutter)
            }

            Text("Shape.offset(x:y:) returns an OffsetShape. Unlike the .offset view modifier, it moves the path itself, so the result is still a Shape: you can subtract it, intersect it, fill it or stroke it. Slide to grow the moon from full to a thin crescent.")
                .font(.footnote)
                .foregroundStyle(.secondary)
                .multilineTextAlignment(.center)
        }
        .padding()
    }
}
3. OffsetTransition
Когда представление появляется, его можно заставить въехать на экран с помощью .transition(.move(edge: .bottom)). Но .move всегда начинает движение полностью за границей соответствующего края экрана.
В демонстрации два ползунка задают расстояние по осям X и Y. Нажимая «Показать» и «Скрыть», можно увидеть, как сообщение появляется и исчезает из точно заданной точки.
Код:
struct OffsetTransitionDemo: View {
    @State private var isShown = false
    @State private var x: CGFloat = 120
    @State private var y: CGFloat = 60

    var body: some View {
        VStack(spacing: 24) {
            ZStack {
                if isShown {
                    Label("Saved to Photos", systemImage: "checkmark.circle.fill")
                        .font(.headline)
                        .foregroundStyle(.white)
                        .padding(.horizontal, 20)
                        .padding(.vertical, 14)
                        .background(.green.gradient, in: .capsule)
                        .shadow(radius: 8, y: 4)
                        .transition(OffsetTransition(CGSize(width: x, height: y)).combined(with: .opacity))
                }
            }
            .frame(maxWidth: .infinity)
            .frame(height: 200)
            .background(.quaternary, in: .rect(cornerRadius: 28))

            Button(isShown ? "Hide" : "Show", systemImage: isShown ? "eye.slash" : "eye") {
                withAnimation(.spring(duration: 0.5, bounce: 0.3)) { isShown.toggle() }
            }
            .buttonStyle(.borderedProminent)

            VStack(alignment: .leading) {
                Text("OffsetTransition(CGSize(width: \(Int(x)), height: \(Int(y))))")
                    .font(.caption.monospaced())
                Slider(value: $x, in: -200...200) { Text("x") }
                Slider(value: $y, in: -200...200) { Text("y") }
            }

            Text("move(edge:) always slides from a whole edge, all the way off screen. OffsetTransition lets you pick the exact distance and direction, even diagonal — a short nudge feels lighter than a full slide.")
                .font(.footnote)
                .foregroundStyle(.secondary)
                .multilineTextAlignment(.center)
        }
        .padding()
    }
}
4. OpacityTransition
Вероятно, вы много раз писали .transition(.opacity). Но знаете ли вы, что за ним стоит настоящий тип под названием OpacityTransition?
Начиная с iOS 17 переходы стали полноценными типами, а полноценные типы дают дополнительные удобные возможности. Их можно комбинировать между собой и назначать каждому собственную скорость.
В демонстрации можно выбрать один из четырёх вариантов через сегментированный переключатель. Код выбранного варианта показывается ниже, а кнопка «Исчезнуть / Появиться» позволяет сразу проверить результат.
Код:
private enum FadeRecipe: String, CaseIterable, Identifiable {
    case plain = "Plain"
    case scale = "+ Scale"
    case blur = "+ Blur"
    case slow = "Slow out"

    var id: Self { self }

    @MainActor
    var transition: AnyTransition {
        switch self {
        case .plain:
            AnyTransition(OpacityTransition())
        case .scale:
            AnyTransition(OpacityTransition().combined(with: ScaleTransition(0.6)))
        case .blur:
            AnyTransition(OpacityTransition().combined(with: BlurReplaceTransition(configuration: .downUp)))
        case .slow:
            // The transition carries its own animation, whatever animation triggered it.
            AnyTransition(OpacityTransition().animation(.easeOut(duration: 1.5)))
        }
    }

    var code: String {
        switch self {
        case .plain: "OpacityTransition()"
        case .scale: "OpacityTransition()\n  .combined(with: ScaleTransition(0.6))"
        case .blur: "OpacityTransition()\n  .combined(with: BlurReplaceTransition(...))"
        case .slow: "OpacityTransition()\n  .animation(.easeOut(duration: 1.5))"
        }
    }
}

struct OpacityTransitionDemo: View {
    @State private var recipe = FadeRecipe.plain
    @State private var isShown = true

    var body: some View {
        VStack(spacing: 24) {
            Picker("Recipe", selection: $recipe) {
                ForEach(FadeRecipe.allCases) { Text($0.rawValue).tag($0) }
            }
            .pickerStyle(.segmented)

            ZStack {
                if isShown {
                    Image(systemName: "sparkles")
                        .font(.system(size: 72))
                        .foregroundStyle(.white)
                        .frame(width: 160, height: 160)
                        .background(.purple.gradient, in: .rect(cornerRadius: 32))
                        .transition(recipe.transition)
                }
            }
            .frame(height: 200)

            Text(recipe.code)
                .font(.caption.monospaced())
                .frame(maxWidth: .infinity, alignment: .leading)
                .padding()
                .background(.quaternary, in: .rect(cornerRadius: 12))

            Button(isShown ? "Fade out" : "Fade in") {
                withAnimation(.snappy) { isShown.toggle() }
            }
            .buttonStyle(.borderedProminent)

            Text("OpacityTransition is the type behind .opacity. As a real struct it plugs into the Transition API: combine it with other transition types, or attach an animation that only this transition uses.")
                .font(.footnote)
                .foregroundStyle(.secondary)
                .multilineTextAlignment(.center)
        }
        .padding()
    }
}
5. .onScrollVisibilityChange
Представьте видео в ленте социальной сети. Оно должно начинать воспроизводиться, когда пользователь докручивает до него, и останавливаться, когда видео уходит за пределы экрана.
До iOS 18 для этого приходилось самостоятельно измерять положение представления с помощью GeometryReader. Теперь достаточно одного модификатора:
VideoCard()
    .onScrollVisibilityChange(threshold: 0.5) { isVisible in
        isPlaying = isVisible
    }
В демонстрации видеоролик расположен посередине ленты из серых блоков. Когда пользователь докручивает до него, он становится розовым и начинает «воспроизводиться» с движущейся звуковой волной. Когда он уходит с экрана, блок снова становится серым и останавливается.
Ползунок сверху позволяет менять пороговое значение, чтобы увидеть разницу между 10% и 100% видимости.
Код:
struct OnScrollVisibilityChangeDemo: View {
    @State private var isPlaying = false
    @State private var threshold = 0.5

    var body: some View {
        ScrollView {
            VStack(spacing: 16) {
                VStack(alignment: .leading) {
                    Text("threshold: \(threshold, format: .percent)")
                        .font(.callout.monospaced())
                    Slider(value: $threshold, in: 0.1...1)
                    Text("Scroll the clip in and out of view. It plays once at least this much of it is on screen, and pauses when it leaves — no GeometryReader, no frame math.")
                        .font(.footnote)
                        .foregroundStyle(.secondary)
                }
                .padding()
                .background(.quaternary, in: .rect(cornerRadius: 20))

                ForEach(0..<4) { _ in placeholderPost }

                VStack(spacing: 12) {
                    Image(systemName: isPlaying ? "waveform" : "pause.fill")
                        .font(.system(size: 64))
                        .symbolEffect(.variableColor.iterative, isActive: isPlaying)
                        .contentTransition(.symbolEffect(.replace))
                    Text(isPlaying ? "Playing" : "Paused")
                        .font(.title2.bold())
                }
                .foregroundStyle(.white)
                .frame(maxWidth: .infinity)
                .frame(height: 260)
                .background((isPlaying ? Color.pink : Color.gray).gradient, in: .rect(cornerRadius: 24))
                .onScrollVisibilityChange(threshold: threshold) { isVisible in
                    withAnimation(.snappy) { isPlaying = isVisible }
                }

                ForEach(0..<6) { _ in placeholderPost }
            }
            .padding()
        }
    }

    private var placeholderPost: some View {
        RoundedRectangle(cornerRadius: 20)
            .fill(.quaternary)
            .frame(height: 120)
    }
}
6. .onScrollPhaseChange
Прокручиваемое представление всегда находится в одной из пяти фаз:
.idle— ничего не движется;.tracking— палец уже касается экрана, но ещё почти не переместился;.interacting— палец перетаскивает содержимое;.decelerating— пользователь отпустил палец, но содержимое продолжает двигаться по инерции;.animating— прокрутка выполняется программно, а не пальцем.
.onScrollPhaseChange сообщает каждый раз, когда происходит переход из одной фазы в другую. Вы получаете как предыдущую, так и новую фазу.
Код:
struct OnScrollPhaseChangeDemo: View {
    @State private var phase = ScrollPhase.idle
    @State private var flicks = 0

    var body: some View {
        ScrollView {
            LazyVStack(spacing: 12) {
                ForEach(1...60, id: \.self) { index in
                    Text("Message \(index)")
                        .frame(maxWidth: .infinity, alignment: .leading)
                        .padding()
                        .background(.quaternary, in: .rect(cornerRadius: 14))
                }
            }
            .padding()
        }
        .onScrollPhaseChange { oldPhase, newPhase in
            // A flick is a finger lifting while the content keeps moving.
            if oldPhase == .interacting && newPhase == .decelerating { flicks += 1 }
            withAnimation(.snappy) { phase = newPhase }
        }
        .safeAreaInset(edge: .top) {
            HStack {
                Text("phase: .\(name(of: phase))")
                Spacer()
                Text("flicks: \(flicks)")
            }
            .font(.callout.monospaced())
            .padding()
            .background(.bar)
        }
        .overlay(alignment: .bottomTrailing) {
            // Get out of the way while the user scrolls, come back when they stop.
            Button("Compose", systemImage: "square.and.pencil") {}
                .labelStyle(.iconOnly)
                .font(.title2)
                .padding(18)
                .background(.blue.gradient, in: .circle)
                .foregroundStyle(.white)
                .shadow(radius: 6, y: 3)
                .padding(24)
                .opacity(phase.isScrolling ? 0 : 1)
                .scaleEffect(phase.isScrolling ? 0.5 : 1)
        }
    }

    private func name(of phase: ScrollPhase) -> String {
        switch phase {
        case .idle: "idle"
        case .tracking: "tracking"
        case .interacting: "interacting"
        case .decelerating: "decelerating"
        case .animating: "animating"
        @unknown default: "unknown"
        }
    }
}
7. .onScrollTargetVisibilityChange
Возможность под номером 5 отслеживает одно представление. Эта же отслеживает сразу все элементы и возвращает список тех, которые сейчас находятся на экране.
Для работы нужны две части. Сначала необходимо пометить контейнер с помощью .scrollTargetLayout(). Затем модификатор добавляется к прокручиваемому представлению.
В демонстрации заголовок показывает что-то вроде «Строки 12–18 из 100», а соответствующие строки подсвечиваются зелёным по мере прокрутки.
Код:
struct OnScrollTargetVisibilityChangeDemo: View {
    @State private var visible: [Int] = []
    private let total = 100

    private var summary: String {
        guard let first = visible.min(), let last = visible.max() else { return "Nothing fully visible" }
        return "Rows \(first)–\(last) of \(total)"
    }

    var body: some View {
        ScrollView {
            LazyVStack(spacing: 8) {
                ForEach(1...total, id: \.self) { row in
                    HStack {
                        Text("\(row)")
                            .font(.headline.monospacedDigit())
                            .frame(width: 44)
                        RoundedRectangle(cornerRadius: 6)
                            .fill(visible.contains(row) ? Color.green.opacity(0.5) : Color.secondary.opacity(0.15))
                            .frame(height: 12)
                    }
                    .padding(.horizontal)
                    .frame(height: 52)
                }
            }
            .scrollTargetLayout()
        }
        .onScrollTargetVisibilityChange(idType: Int.self, threshold: 0.9) { ids in
            visible = ids
        }
        .safeAreaInset(edge: .top) {
            VStack(spacing: 4) {
                Text(summary)
                    .font(.headline.monospacedDigit())
                Text("Each child of .scrollTargetLayout() reports its id once 90% of it is on screen.")
                    .font(.caption)
                    .foregroundStyle(.secondary)
                    .multilineTextAlignment(.center)
            }
            .frame(maxWidth: .infinity)
            .padding()
            .background(.bar)
        }
    }
}
8. .overlayPreferenceValue
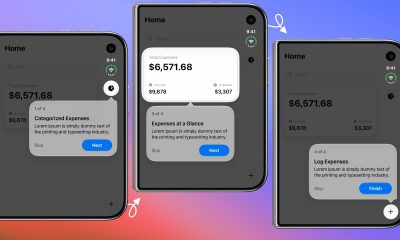
Представьте пошаговое знакомство пользователя с приложением. «Введите здесь своё имя». Далее. «Здесь включаются уведомления». Далее. Подсвечивающая рамка перемещается от одного элемента управления к другому.
В демонстрации при нажатии «Следующая подсказка» оранжевая рамка с пружинной анимацией перемещается от текстового поля к переключателю, затем к ползунку и кнопке «Сохранить».
Каждому элементу управления достаточно сообщить: «Я нахожусь здесь». Всю отрисовку выполняет родительское представление.
Код:
private struct TipAnchorKey: PreferenceKey {
    static var defaultValue: [Int: Anchor<CGRect>] { [:] }

    static func reduce(value: inout [Int: Anchor<CGRect>], nextValue: () -> [Int: Anchor<CGRect>]) {
        value.merge(nextValue()) { $1 }
    }
}

struct OverlayPreferenceValueDemo: View {
    @State private var step = 0
    @State private var name = ""
    @State private var notifications = true
    @State private var volume = 0.6

    private let tips = [
        "Start by typing your name.",
        "Turn notifications on or off here.",
        "Drag to set the volume.",
        "All done! Save when you're ready.",
    ]

    var body: some View {
        VStack(spacing: 20) {
            VStack(spacing: 16) {
                TextField("Your name", text: $name)
                    .textFieldStyle(.roundedBorder)
                    .tipAnchor(0)
                Toggle("Notifications", isOn: $notifications)
                    .tipAnchor(1)
                Slider(value: $volume)
                    .tipAnchor(2)
                Button("Save") {}
                    .buttonStyle(.borderedProminent)
                    .tipAnchor(3)
            }
            .padding(20)
            .background(.quaternary, in: .rect(cornerRadius: 24))
            // Each control publishes where it is; the overlay reads them all and highlights one.
            .overlayPreferenceValue(TipAnchorKey.self) { anchors in
                GeometryReader { proxy in
                    if let anchor = anchors[step] {
                        let rect = proxy[anchor]
                        RoundedRectangle(cornerRadius: 14)
                            .stroke(.orange, lineWidth: 3)
                            .frame(width: rect.width + 16, height: rect.height + 16)
                            .position(x: rect.midX, y: rect.midY)
                            .allowsHitTesting(false)
                    }
                }
            }

            Text(tips[step])
                .font(.headline)
                .contentTransition(.opacity)

            Button("Next tip", systemImage: "arrow.right") {
                withAnimation(.spring(duration: 0.45, bounce: 0.25)) { step = (step + 1) % tips.count }
            }
            .buttonStyle(.bordered)

            Text("Children send up Anchor<CGRect> values with .anchorPreference. .overlayPreferenceValue reads them in the parent and draws one overlay above everything, turning each anchor into a frame with the GeometryReader proxy. Great for coach marks and onboarding tours.")
                .font(.footnote)
                .foregroundStyle(.secondary)
                .multilineTextAlignment(.center)
        }
        .padding()
    }
}

private extension View {
    func tipAnchor(_ id: Int) -> some View {
        anchorPreference(key: TipAnchorKey.self, value: .bounds) { [id: $0] }
    }
}
Спасибо, что дочитали до конца!